Part Nine: "Seemingly Seamless"

"Sometime in the Fall, 2015..."

When we left off, the entire coach was covered in a protective, fiberglass skin.  Some things we need to address is all the seams. 

There are seams where the roof meet the walls, seams around the tail lights and more seams around the license plate recess.  We want the coach to be skinned in 100% fiberglass, so the next step is to mold all the seams in.  To do this we decided to use carbon fiber. There will be a certain amount of stress and flex on the seams and carbon fiber is by far the strongest and lightest way to go.  With several hours invested in the lay-up and epoxy process, here's what we've got:


Now remember, sometimes you have to make it look ugly before it will look good.  This is one of those times!


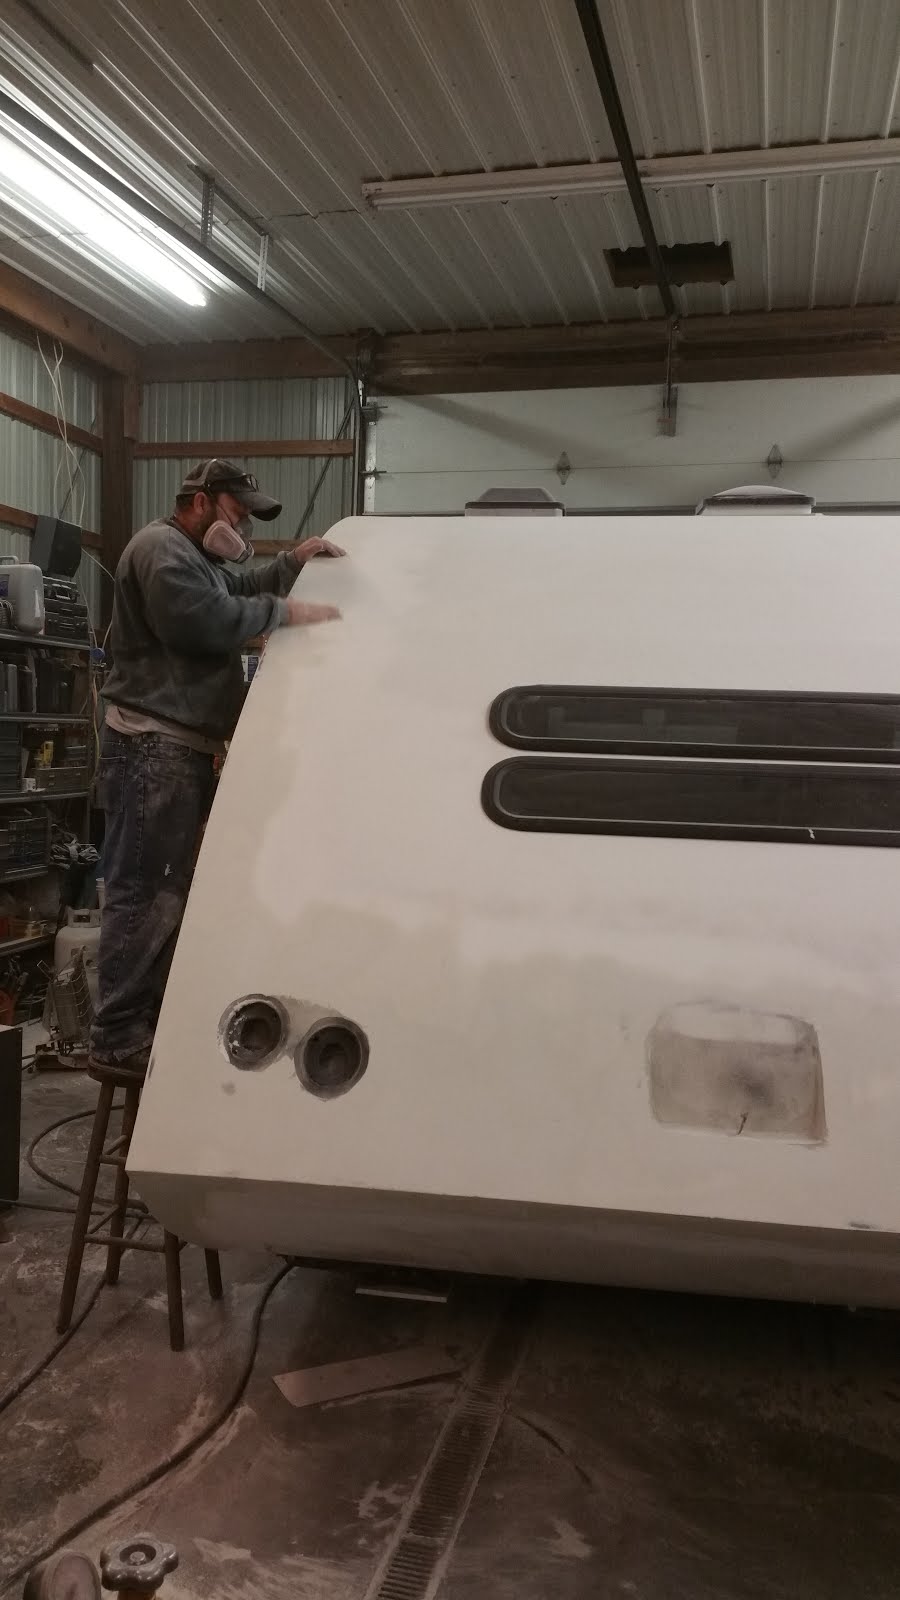
After all the carbon was laid up and the epoxy has set, it was time to start grinding and shaping all the corners.  This is a very tedious and time consuming process to get it right but very worth the effort in terms of longevity and durability.


Getting the corners perfectly square takes a lot of time and patience!

After all the carbon fiber seams were shaped, the next step is to apply a high quality, lightweight filler to make everything perfect...


As you can now see... the corners are becoming very square, sharp and seamless!


It takes many, many hours of body work to make those seams completely disappear.  The goal is to make it all become one piece.


Look Mom, no seams!  


Crisp and Clean!


By this stage of the project, we are well into the Winter of 2015. All the body work is complete and it is time for several coats of Urethane Primer...


(Hey look... it's another one of our many projects going on!  My brother's 1937 Chevy Street Rod Project! And this 'ol girl is a Beast!  Nova Sub-Frame, Nova Rear End, Small Block Chevy, Chopped Top and Shaved Hardware!)

Back to the primer coats... Many, many coats of primer.


Look how smooth it's become!  


And now the Primer is done!


We don't know about you... But to us this baby is really starting to look like a bona-fide camper!

That's about it for now... Thanks again for following along with this project!  Please leave us a comment we would love to hear from you! 

Happy Creations!

Michael and Carrie


Part Eight: "Artistic Aurora"

This next post is a brief focus on one of my favorite artists... Carrie. She really is a creative genius and her talent flows throughout this project.  We have a creative process between us, usually me with crazy dreams and ideas and Carrie bringing those crazy dreams and ideas into perspective.

Here we are on one of our Outdoor Adventures to somewhere...


When you bend plywood around curves things don't always turn out as round as you would like. Here is Carrie, doing her thing, sanding and shaping the radius to make it just right.


Typically I'll sketch ideas on paper and Carrie will bring them to life.  Her design abilities are amazing to me.  I had this vivid memory of a Space Boy on an old 1950's Anchor-Hocking drinking glass from my childhood that was super retro and nostalgic. I've always liked things from the Mid-Century, Atomic, Space-Age era.  I made a few sketches and she created something beyond my expectations. Oh, and of course, the Space Boy had to have a Space Girl to keep him company... I love the way she thinks!  This drawing kind of defines the theme for the camper and we will use it strategically throughout the build...


I love advertising from the 50's and 60's and this really represents that for me. Spacey and nostalgic!  Great job Carrie... You captured that feeling I used to get as a kid every time I looked at my Space Boy!  

Another thing I felt was a "must-have" for this build was nostalgic metal emblems like you would find on an old muscle car.  I didn't want vinyl graphics, it had to be a lot more vintage than that. So again, I imagined some lettering and Carrie brought it to life.  Now keep in mind that neither one of these projects happened overnight. Basically it's me saying, "could you change this a bit?" And Carrie doing her magic...and this goes on for a few months. I agonize over the details and she kindly makes the adjustments to the project. Towards the end, it's me saying, "could you correct this line right here?"  And Carrie rolling her eyes and wondering why she ever got involved with such a crazy, obsessive-compulsive perfectionist!  But she always makes it happen and for that I am always grateful.  Thanks Carrie for your patience with me and our Art!  

Here are the emblems.  After hours and hours of design we turned the program over to our friend Topher who used a waterjet to cut them out of aluminum.  Great work guys!


After the pieces were cut, we bonded multiple pieces together to form a 3-D drop-shadow look, then painstakingly painted each piece by hand to end up with something truly one of a kind!  


Special thanks to the creative people in my life that help me turn dreams into reality through their generous donation of time, energy, talent, skills and self...


Dan Watts, CAD Genius


Topher Beyer, Metal Art Guru


Matt Adams, Visionary, Master Craftsman, Problem Solving Prodigy

 
Kent Smith, Long-Time family friend, Woodcraft Artisan


Kevin Smith, Faithful Friend, Everything Electrical, Extraordinaire 

And of course, Carrie Beth... 

Artist, Designer, Computer Expert, Perpetual Perpetrator of Peace, My Sweet Cosmic Light, whose creative expertise, design skills, never-ending patience and beautiful smile I could never live without!

And that's it for our Artist Spotlight!  Come back again for the next installment! 

As always follow us and leave a comment so we know what you think!

Happy Creations!

Michael and Carrie  

Part Seven: "The Filon Finale"

June/July, 2015

A lot of time has passed in the build since the last post.  There has been an enormous amount of sanding, sanding and more sanding. There has been other work and planning going on behind the scenes as well.  The coach is being stored at brother Matt's house which is an hour and a half, one way.  And Michael is racing professionally all summer long, so no camper building goes on while he is traveling.  

So...The Filon Fanale?  Are we at the end?  The answer is yes and no. The build is far from over but regarding the Filon, we will soon be done!  That means the entire coach will be wrapped in a thin, protective layer of fiberglass that will stand up to the elements, be able to have an automotive type finish and give it a "wash and go" kind of attitude!

When we left off last time the Astroliner was really starting to look like a real live camper; walls up, roof on, windows and hatches cut out.  The walls are already covered in Filon, now it's time to cover the roof as well.

The first thing we need to do is roll the Filon out over the coach and lay it into place:


We used a couple straps to help position the piece and give it a bit of stretch...

Next we trimmed the Filon for fit.  


And made patterns of things we needed to go around and glass in later.


Now that everything is cut and fit, it is time for the Red Glue! Because the coach is way too big for a vacuum bag, we are using 
Red Glue to attach the Filon to the roof rather than epoxy like we did on the walls.  This is actually the way the RV manufacturers do it, such as Jayco or Fleetwood.

Here's the prepared surface, coated in epoxy that has been cured and sanded, and ready for some glue...


The glue is sprayed through a special applicator gun...


We sprayed it on the coach side as well as the Filon side...


Straps hold things in place while the glue dries...


Then she looks like this after the windows are cut out and the sides trimmed with a router:


And that is it for the Filon!  In the upcoming post we will be working on glassing in all the seams so stay tuned for more progress!

Be sure to follow our blog for future updates and please feel free to ask questions and comment!  We would really like to hear from you!

Happy Creations!

Michael & Carrie